Example System: MQTTDevice V4 based Fermentation
This setup is based on the MQTTDevice V4 which is using an ESP8266 as central unit. The ESP has to be flashed with Innuendos firmware. With this setup, you can read the sensors hooked up to the MQTTdevice via the mqtt sensor included in cbpi and you can control the heater / cooler for each fermenter via standard cbpi mqtt actors.
Hardware requirements
It is recommended to use the PCB described in the aforementioned link.
You will also need to connect DS18B20 Onewire sensors (one per fermenter) for temperature measurement to the device.
2 Relays (5 Volt) per Fermenter are required (one for cooling, one for heating per fermenter)
One 5 Volt supply unit for the ESP8266 is required.
Plug connectors (in my case 230 Volt) are required.
Connectors for the Sensors are recommended.
A drip water safe case.
Magnetic valves to open and close the cooling loop for the fermenter
Heating pad or cable (25 Watts for 20-30 Liter Fermenter is sufficient). This may vary for your fermenters.
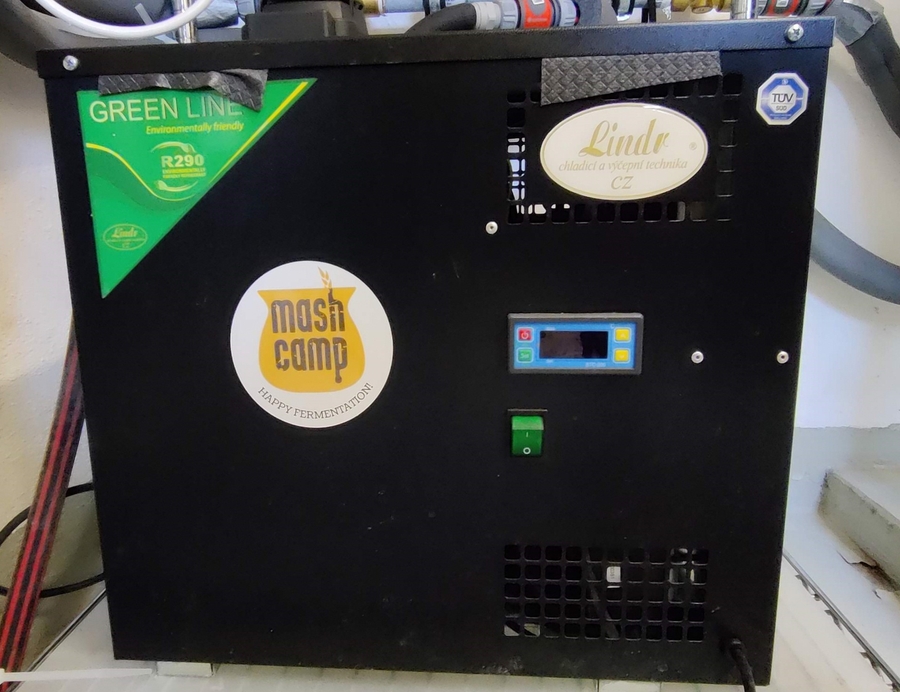
One Chiller (in my example it is a Lindr AS-40 Glycol which has the advantage that you won't need a bypass valve in case the cooling valves are all closed)
Thats about it for the hardware part.
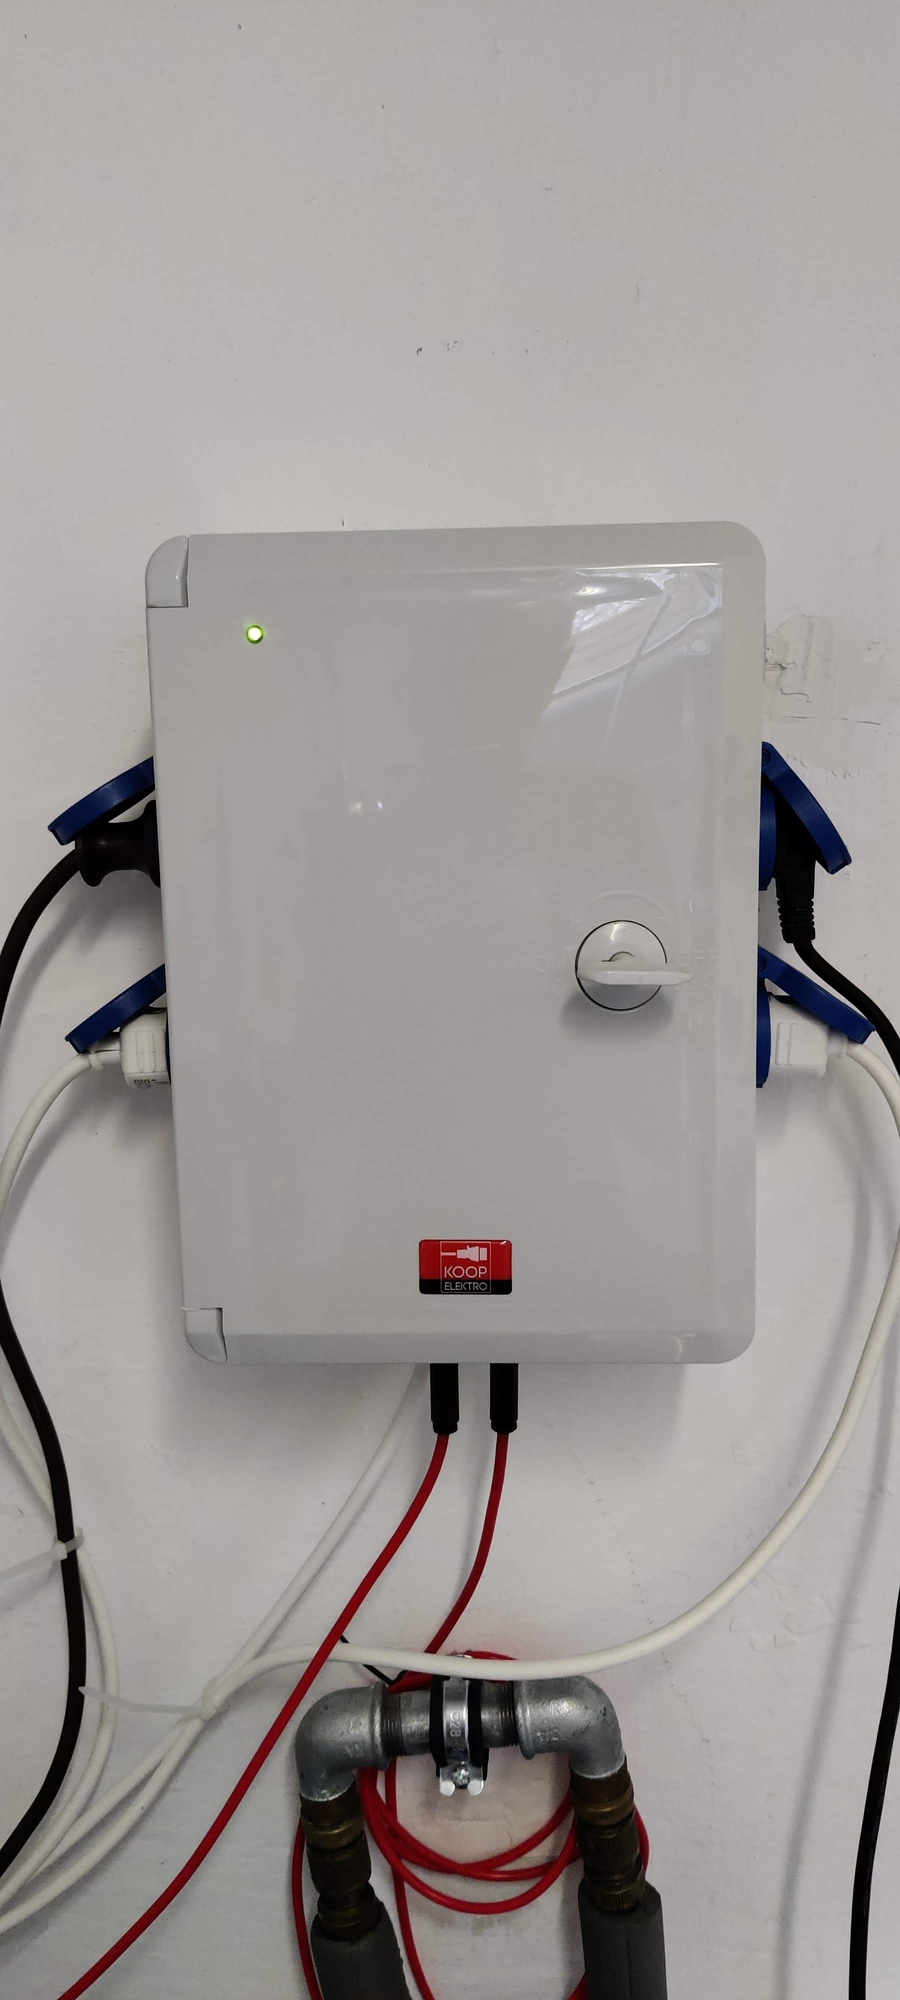
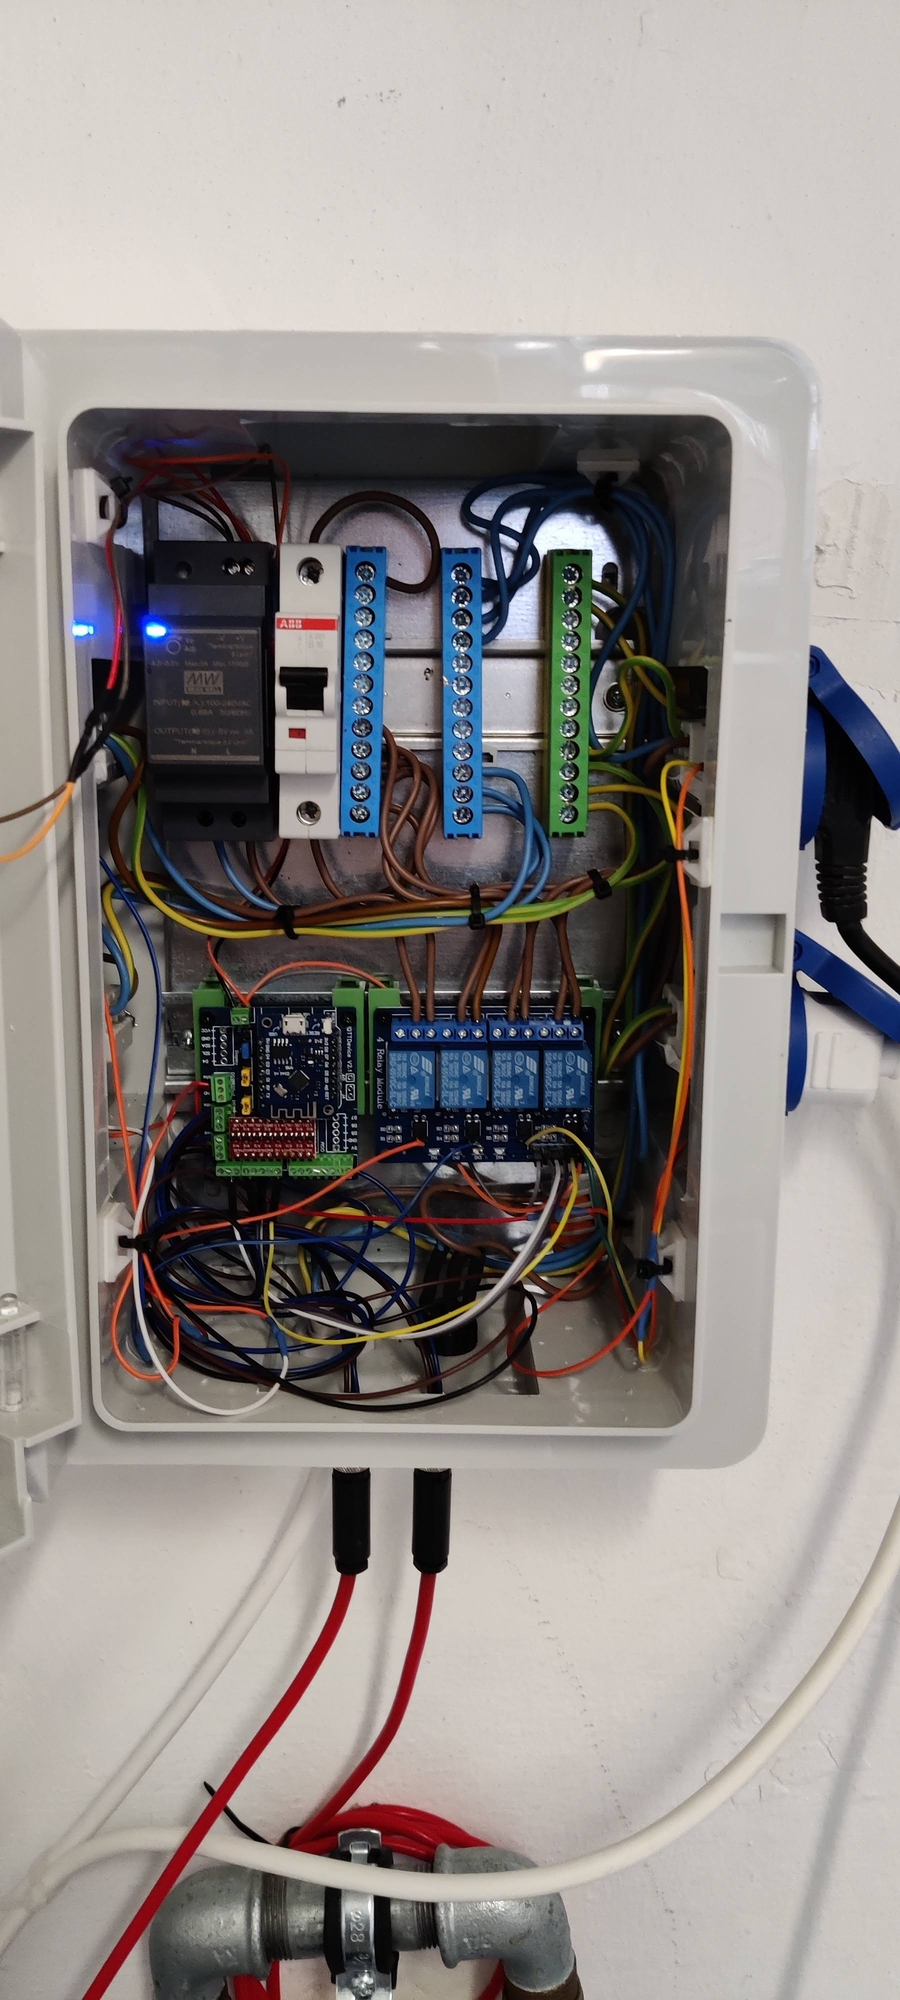
The image below shows the drip water safe case from the outside and the inside equipped with the ESP8266, the power supply and the relays.
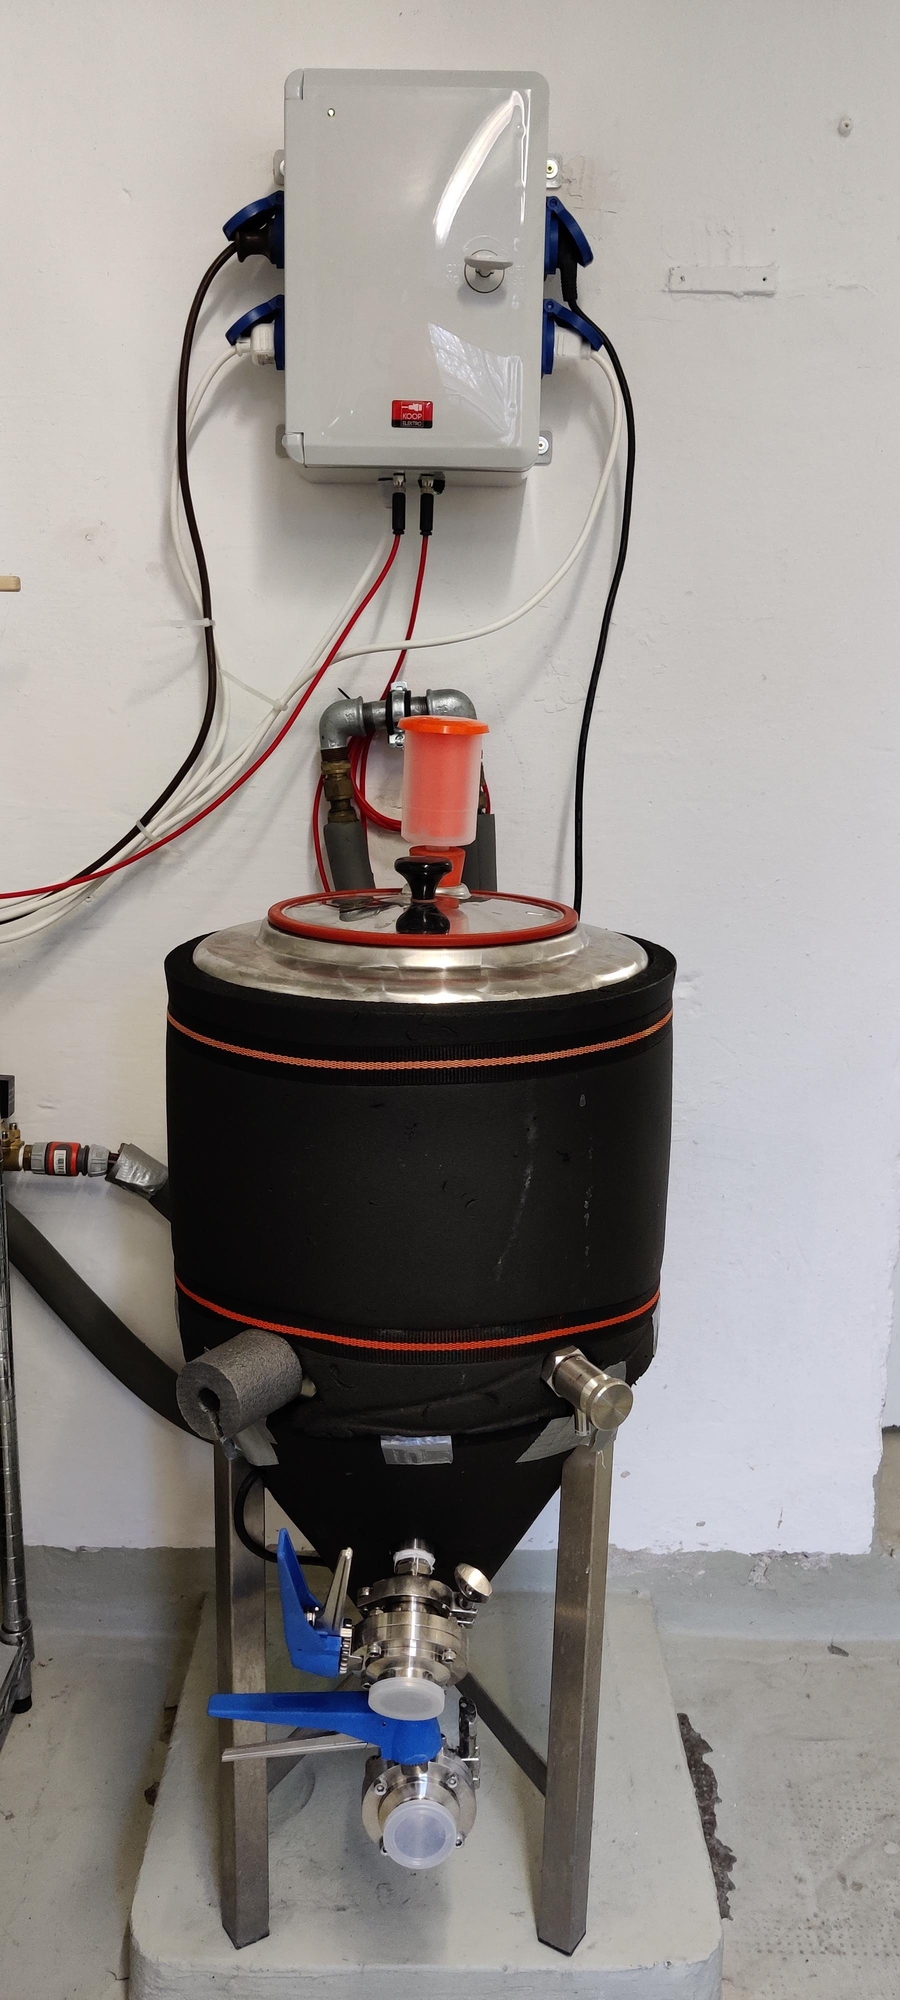
The next image shows the Lindr AS-40 Glycol Chiller which is hooked up to the cooling loop for two fermenters.
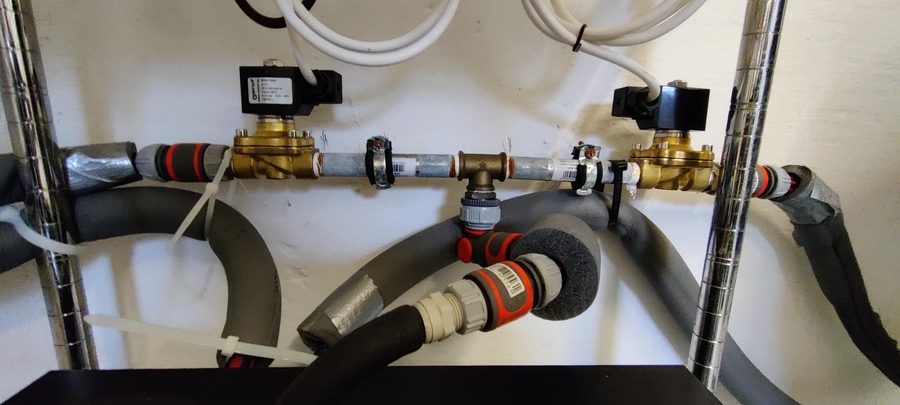
Here you can see the two magnetic valves I am using to supply my two fermenters independently with glycol. Each of them is connected to one of the 230 Volt Relays from the MQTTDevice setup.
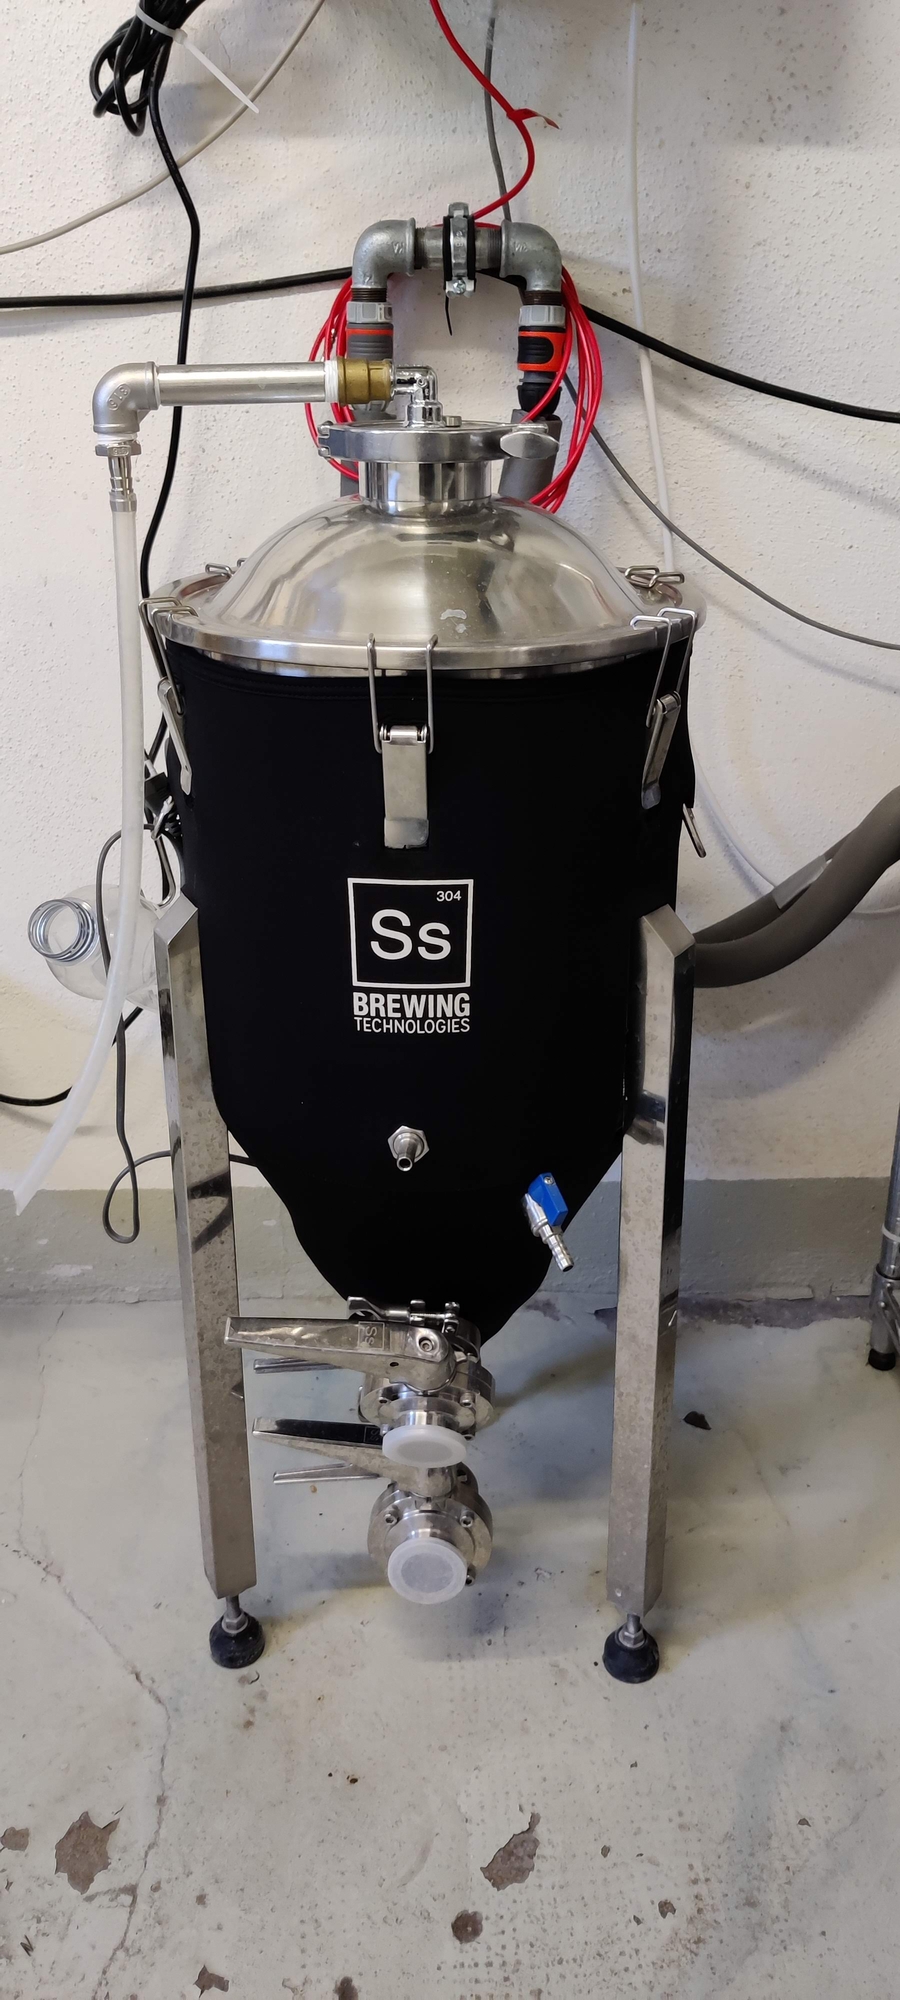
I am using one SS Brewtech BME 7 gal and one Speidel 30 Liter Fermenter. Each fermenter is connected to one of the two cooling lines.
CraftbeerPi 4 software requirements
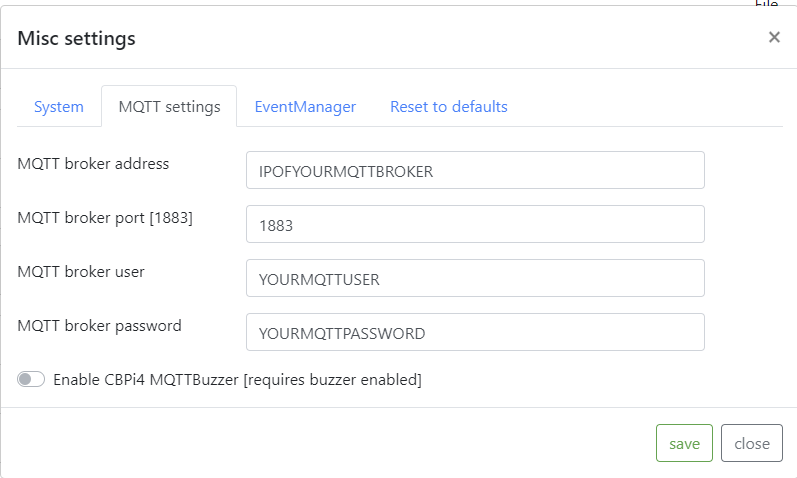
You need to activate mqtt as described here
I do recommend to install and use also the Pushover Plugin to receive push notifications when a step is finished or a target temp is reached and you need to pitch the yeast. Therefore, you need to buy the PushOver APP for Android or IOS
I also recommend to install the Kettle Sensor Plugin if you want to monitor some more information about your fermenter such as target temp and cooling or heating status.
Setup your Fermenter hardware in CraftbeerPi 4
Details on how to setup your software are not shown here, as this is already described in the other chapters.
Setup your Fermenter hardware in the mqttdevice
Flashing of the device is not described here as it is documented on Innuendos page
If you have installed the mqtt broker on your pi, enter the IP address of your pi in the corresponding setup window of the mqttdevice.
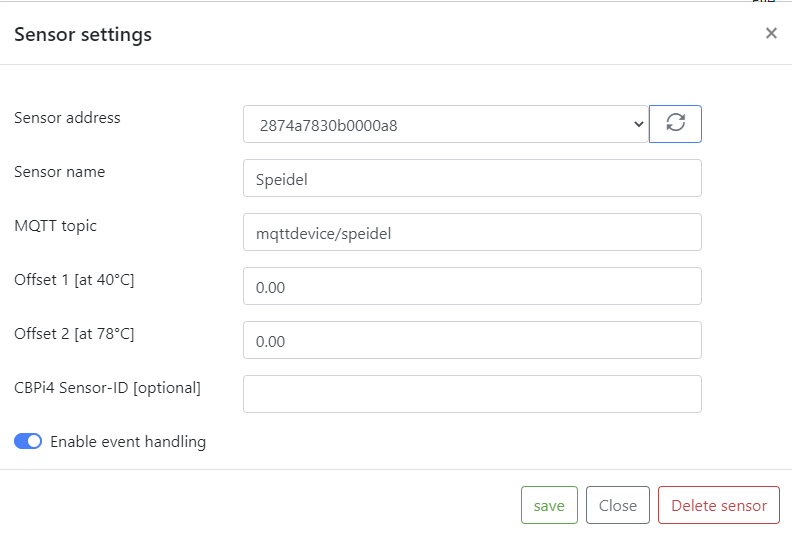
You need to add a sensor or multiple sensors to your mqttdevice depending on the amount of fermenters you want to control. The topic you enter here must match the topic you enter later in your cbpi mqtt sensor settings. The other fields don't need to be changed or filled.
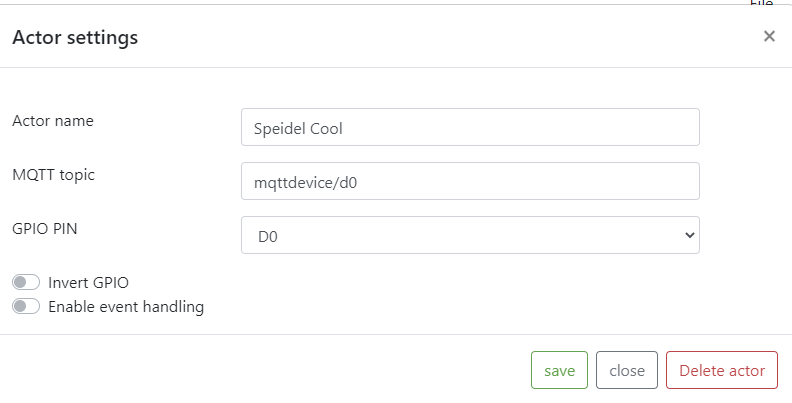
You also need to add actors for your fermenter. In this example you basically need to add two actors per fermenter. One for Cooling and one for heating your fermenter. The example below shows one of the actors. You need to enter again one topic and you must specify one of the output pins. In this example it is 'd0'.
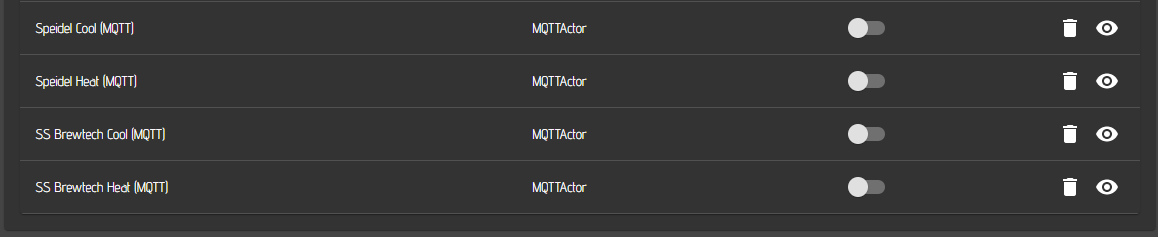
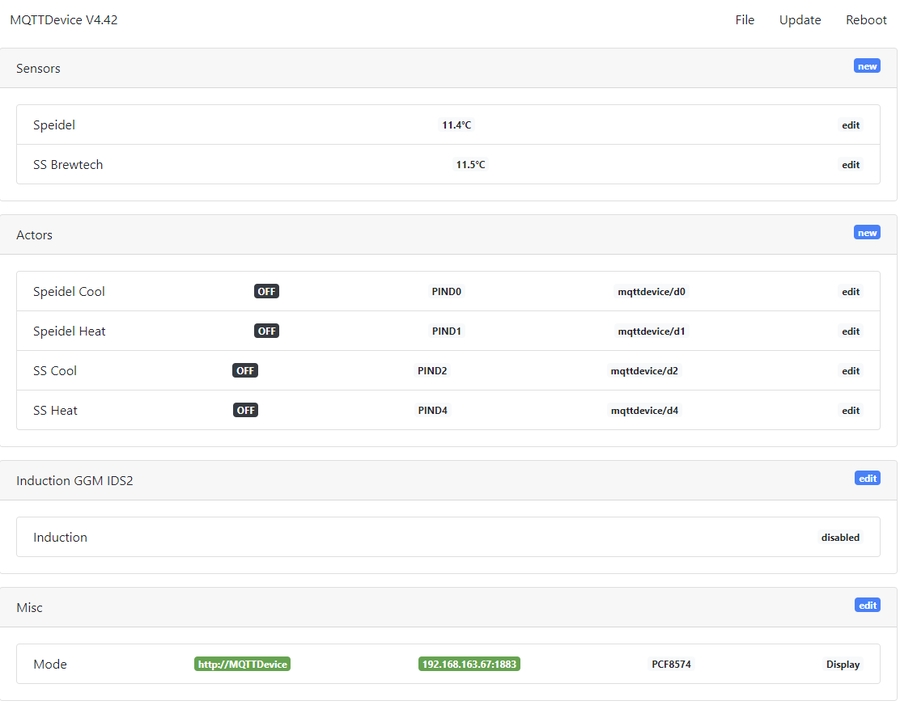
Once you have saved all your sensors and actors, your overview of the mqtt device web interface should look like this:
If you are running only one fermenter, you need to specify only one sensor and two actors.
Setup your Fermenter hardware in Craftbeerpi 4
You need to setup mqtt sensor, actors and assign them to your fermenter logic.
Actors
First you should define your actors for the Fermenter. You need one for the heating element and one for the cooling valve.
As actor type, MQTTActor must be selected and you need to enter a specific name for your Actor e.g. Speidel Cool (MQTT). The topic must match the topic you have entered in the mqtt device for this actor, e.g. mqttdevice/d0
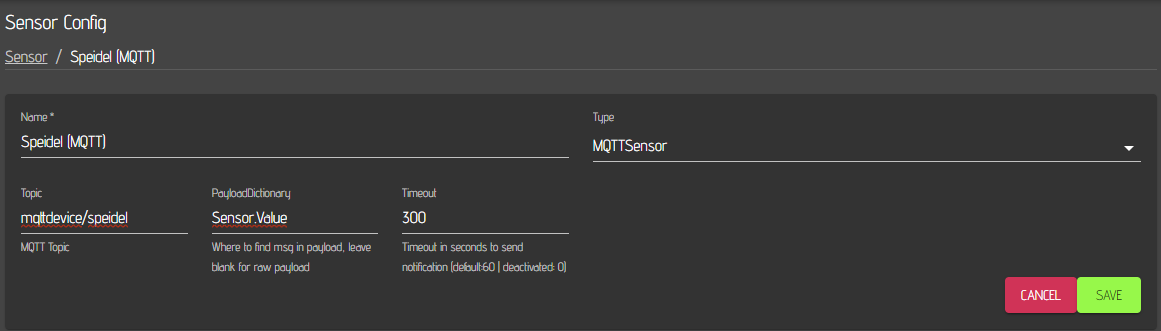
Sensors
You also need to configure mqtt actors in your Craftbeerpi4 hardware section. Add a sensor and select MQTTSensor as type. Also here you need to define a specific name for your sensor, e.g. Speidel (MQTT).. The topic must match the topic on your mqtt device and you must enter Sensor.Value into the payload field. Timeout can be 0 to disable this function. In the example it is set to 300 and the sensor will raise an alert / notification if the sensor does not receive values for 300 seconds (5 minutes).
MQTT Explorer
To get more insight into the mqtt topics/payloads and for troubleshooting, you can download and run the MQTT Explorer
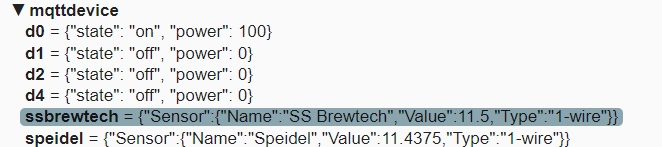
Once started and logged into your mqtt broker, you can see all mqtt topics / payloads in the broker. Below is an example for the mqttdevice, configured as described above. The examples shows temperatures for two configured temperature sensors and the status for four defined actors. One of the actors is switched on, while the other three are off.
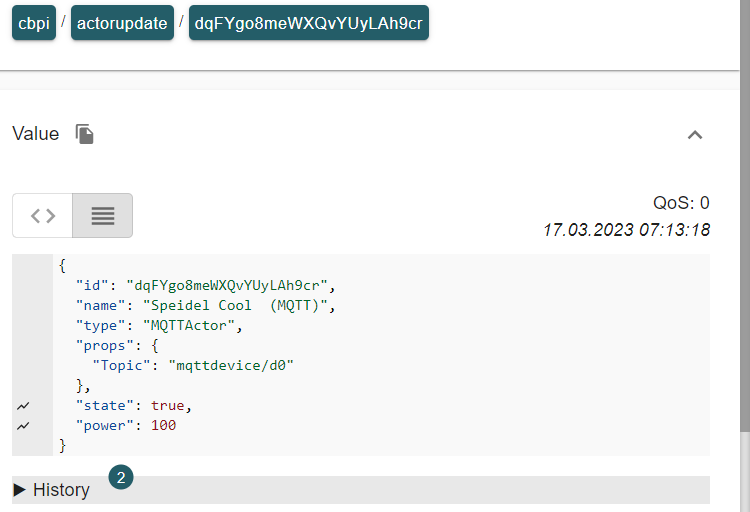
In the image below you can see the payload for one of the actors of the mqttdevice actors that is send via actor update from CraftbeerPi 4.
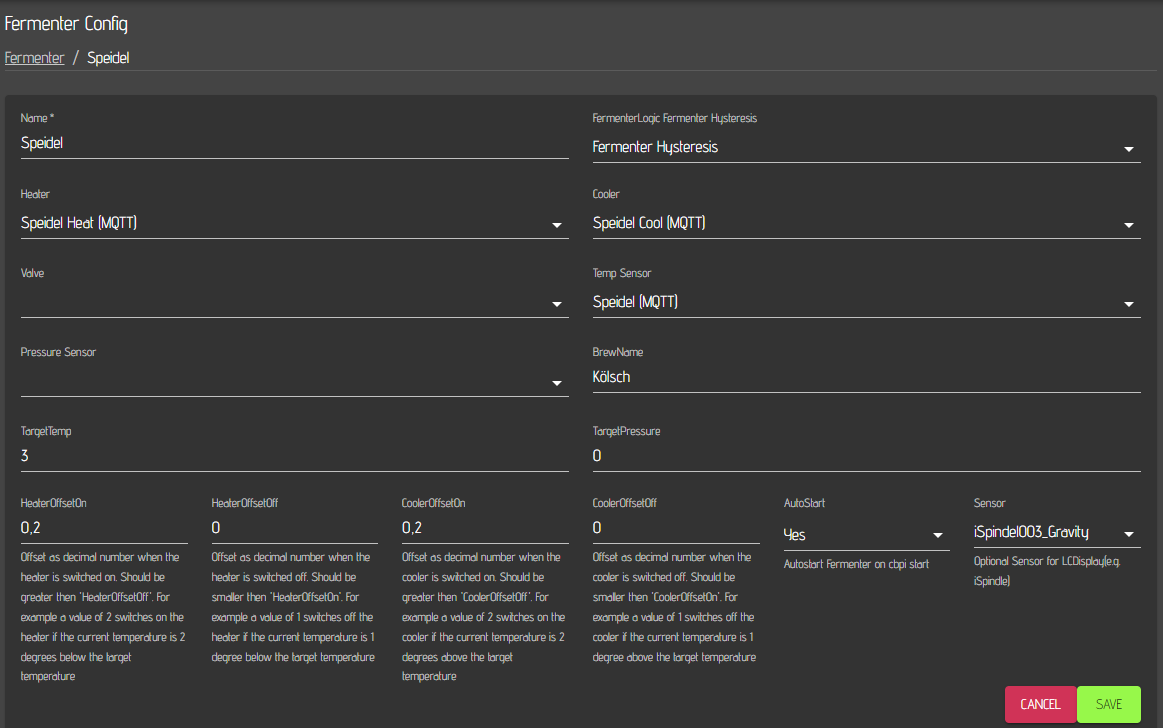
Fermenter logic configuration
Finally, you need to define a Fermenter with the required logic. For Fermentation, CraftbeerPi 4 comes with the Fermenter Hysteresis logic which should be sufficient for almost all use cases. However, users can write their own plugins for fermenter logic.
Specify a unique name for your fermenter, select Fermenter Hysteresis as logic. Select your defined MQTT based Heating actor as Heater and the MQTT based Cooling actor as Cooler. For the Temp sensor select the MQTT based temperature sensor that is hooked up to your MQTT device and defined in Craftbeerpi 4. In this example HeatingOffsetOn as well as CoolingOffsetOn are set to 0.2 which means that the heating element switches on, if the temperature reading is 0.2 degree below the target temp and the cooling valve is triggered, when the temperature reading is 0.2 degree above the target temp. The 'off' values are set to 0 which means, that heating element or cooling valve are switched off, once target temp is reached. Autostart is set to yes, which triggers an autostart of the current step. If you have a step running until an end date, the same end date is the target after restart. The last sensor is just relevant if you are also using the LCD display plugin/hardware.
All other information on fermentation is described here and here
Last updated